KUSANAGIをWindowsで動かしてみよう第2回(宮崎悟氏)
前回のおさらい
前回は、VagrantとVirtualBoxの設定で終わってしまいました。今回は、VirtualBox上のKUSANAGIでWordPressをセットアップしたいと思います。
前回、このような設定ファイルを追記したと思います。
  config.vm.network "forwarded_port", guest: 22, host: 10022, id: "ssh"
  config.vm.network "private_network", ip: "192.168.34.20"

  config.vm.provider "virtualbox" do |vb|
    # Display the VirtualBox GUI when booting the machine
    # vb.gui = true
    # Customize the amount of memory on the VM:
    vb.memory = "1024"
  end
この状態で vagrant.exe upを実行すれば、Vagrant経由でVirtualBoxが立ち上がります。
まず、VirtualBoxイメージをvagrantcloudからダウンロードします。そして、仮想マシンの立ち上げ、仮想ネットワークを作成するところが確認できます。
$ vagrant.exe up
Bringing machine 'default' up with 'virtualbox' provider...
==> default: Box 'primestrategy/kusanagi' could not be found. Attempting to find and install...
    default: Box Provider: virtualbox
    default: Box Version: >= 0
==> default: Loading metadata for box 'primestrategy/kusanagi'
    default: URL: https://vagrantcloud.com/primestrategy/kusanagi
==> default: Adding box 'primestrategy/kusanagi' (v1.0.0) for provider: virtualbox
    default: Downloading: https://vagrantcloud.com/primestrategy/boxes/kusanagi/versions/1.0.0/providers/virtualbox.box
    default: Download redirected to host: vagrantcloud-files-production.s3.amazonaws.com
    default:
==> default: Successfully added box 'primestrategy/kusanagi' (v1.0.0) for 'virtualbox'!
==> default: Importing base box 'primestrategy/kusanagi'...
==> default: Matching MAC address for NAT networking...
==> default: Checking if box 'primestrategy/kusanagi' version '1.0.0' is up to date...
==> default: Setting the name of the VM: kusanagi_default_1560127835493_30083
Vagrant is currently configured to create VirtualBox synced folders with
the `SharedFoldersEnableSymlinksCreate` option enabled. If the Vagrant
guest is not trusted, you may want to disable this option. For more
information on this option, please refer to the VirtualBox manual:

  https://www.virtualbox.org/manual/ch04.html#sharedfolders

This option can be disabled globally with an environment variable:

  VAGRANT_DISABLE_VBOXSYMLINKCREATE=1

or on a per folder basis within the Vagrantfile:

  config.vm.synced_folder '/host/path', '/guest/path', SharedFoldersEnableSymlinksCreate: false
==> default: Clearing any previously set network interfaces...
==> default: Preparing network interfaces based on configuration...
    default: Adapter 1: nat
    default: Adapter 2: hostonly
==> default: Forwarding ports...
    default: 22 (guest) => 10022 (host) (adapter 1)
==> default: Running 'pre-boot' VM customizations...
==> default: Booting VM...
==> default: Waiting for machine to boot. This may take a few minutes...
    default: SSH address: 127.0.0.1:10022
    default: SSH username: vagrant
    default: SSH auth method: private key
    default: Warning: Connection aborted. Retrying...
The guest machine entered an invalid state while waiting for it
to boot. Valid states are 'starting, running'. The machine is in the
'unknown' state. Please verify everything is configured
properly and try again.

If the provider you're using has a GUI that comes with it,
it is often helpful to open that and watch the machine, since the
GUI often has more helpful error messages than Vagrant can retrieve.
For example, if you're using VirtualBox, run `vagrant up` while the
VirtualBox GUI is open.

The primary issue for this error is that the provider you're using
is not properly configured. This is very rarely a Vagrant issue.
この際、VirtualBoxやWindows Defenderで幾つか聞かれることがありますが、これはVagrantがVirtualBoxの仮想ネットワークなどを自動的に作成するためです。すべて「はい」を押しましょう。
sshで接続してみよう
KUSANAGI for Vagrantの公式ドキュメントにある通り、TeraTermやPoderosaなどのSSHクライアントから接続可能です。しかし、ここはWSL(Windows for Subsystem)からsshで接続してみましょう。
基本的には、vagrant.exe ssh でssh接続が可能です。
$ vagrant.exe ssh

     __ ____  _______ ___    _   _____   __________
    / //_/ / / / ___//   |  / | / /   | / ____/  _/
   / ,< / / / /\__ \/ /| | /  |/ / /| |/ / __ / /
  / /| / /_/ /___/ / ___ |/ /|  / ___ / /_/ // /
 /_/ |_\____//____/_/  |_/_/ |_/_/  |_\____/___/

    Version 8.4.2-1, Powered by Prime Strategy.
[vagrant@kusanagi83 ~]
$
もし、これでssh接続出来ない場合は、以下のようにssh鍵を使用してアクセスして下さい。
WSLの端末から以下のコマンドを打つと、sshの接続情報が取得できます。
$ vagrant.exe ssh-config
Host default
  HostName 127.0.0.1
  User vagrant
  Port 10022
  UserKnownHostsFile /dev/null
  StrictHostKeyChecking no
  PasswordAuthentication no
  IdentityFile C:/Users/s-miyaza/.vagrant.d/boxes/primestrategy-VAGRANTSLASH-kusanagi/1.0.0/virtualbox/vagrant_private_key
  IdentitiesOnly yes
  LogLevel FATAL
この情報を元に、ssh鍵ファイルをWSLのホームディレクトリにコピーします。Windowsのパスが表示されるので、wslpath コマンドを使用してWSLのパスに変更すると良いでしょう。また、ssh鍵のパーミションを600にすることを忘れないようにしましょう。
$ mkdir ~/.ssh
$ chmod 700 ~/.ssh
$ cp $(wslpath 'C:/Users/s-miyaza/.vagrant.d/boxes/primestrategy-VAGRANTSLASH-kusanagi/1.0.0/virtualbox/vagrant_private_key') ~/.ssh
$ chmod 600 ~/.ssh/vagrant_private_key
そして、この鍵を使用してsshコマンドを使用します。指定したSSHポートもしくは、private_networkで指定したIPアドレスに以下のように接続できると思います。この場合、WSLのsshコマンド以外のSSH端末から接続可能です。
$ ssh -i ~/.ssh/vagrant_private_key -p 10022 vagrant@127.0.0.1
   or
$ ssh -i ~/.ssh/vagrant_private_key vagrant@192.168.34.20
WordPressの設定をしよう
kusanagiへのssh接続ができればあとは簡単です。sudo コマンドを使用すると root権限でコマンドを実行できます。root権限でkusanagi initとkusanagi provisionを実行すれば、簡単にWordPressのインストールが出来ます。KUSANAGIパスワードやDB情報は、mkpasswdなどを使用して自動生成することをお勧めします。
$ KUSANAGI_PASSWORD=$(mkpasswd -l 20)
$ DBROOTPASS=$(mkpasswd -s 0 -l 20)
$ SITE_DOMAIN=wordpress.localdomain
$ DBNAME=$(mkpasswd -s 0 -l 10 -C 0)
$ DBUSER=$(mkpasswd -s 0 -l 10 -C 0)
$ DBPASS=$(mkpasswd -s 0 -l 20)
kusanagi init/provision コマンドは対話式でも実行可能ですが、オプションのみでもほぼ設定可能です。
kusanagi init は、内部でyum update、SSHホスト鍵作成、certbot-autoの更新などを行うため、時間がかかります。
$ sudo kusanagi init --tz tokyo --lang en --keyboard en --passwd "$KUSANAGI_PASSWORD" --no-phrase --dbrootpass "$DBROOTPASS" --php7 --nginx --ruby24 --dbsystem mariadb
$ sudo kusanagi provision --wplang ja --fqdn $SITE_DOMAIN $EMAILOPTION --dbname $DBNAME --dbuser $DBUSER --dbpass "$DBPASS" kusanagi_html
これで、WordPressのプロビジョンまで終了しました。
管理者権限で、Windowsのホストファイル(C:\Windows\System32\drivers\etc\hosts)に以下の行を追記します。念の為、ipconfig.exe /flushdnsも実行しておいたほうが良いでしょう。
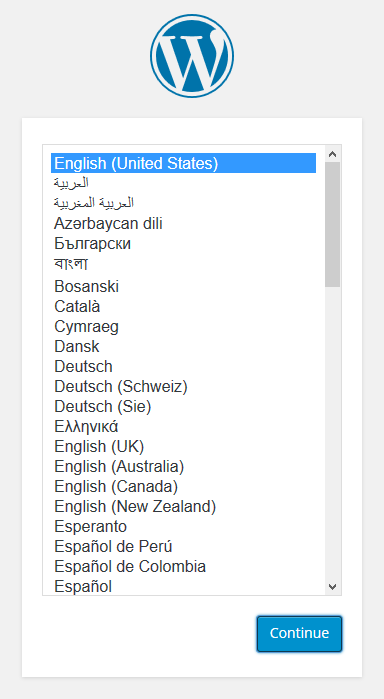
192.168.34.20 wordpresss.localdomainブラウザで http://wordpress.localdomain にアクセスすればWordPressのインストール画面が現れます。

次回予告
今回、VagrantでVirtualBoxの設定を行い、ssh経由でKUSANAGIの設定を行いました。次回は、VagrantだけでWordPressの設定を行いたいと思います。次回をお楽しみにお待ち下さい。
さて、このコラムを掲載いただいているデジタル・ヒュージ・テクノロジー社は老舗のOSSインテグレーターです。特にLinuxは強く、OSSを活用した業務システムの実績も多いで
す。興味がある方は以下のページもご覧ください。
DHT OSS導入コンサルティングサービス
https://kusanagi.dht-jpn.co.jp/solutions/dht-oss-consulting/


